vApp
App Landing Page WordPress Theme
By Dhrubok
Thank you for purchasing our Product. In case of any questions or doubts, do not hesitate to contact us via out Themeforest profile . We will do our best to solve any problem concerning the project. At the same time we invite you to visit often our profile on ThemeForest since there will be appearing the improvements of our project and the newest actualization.
Introduction - #back to top
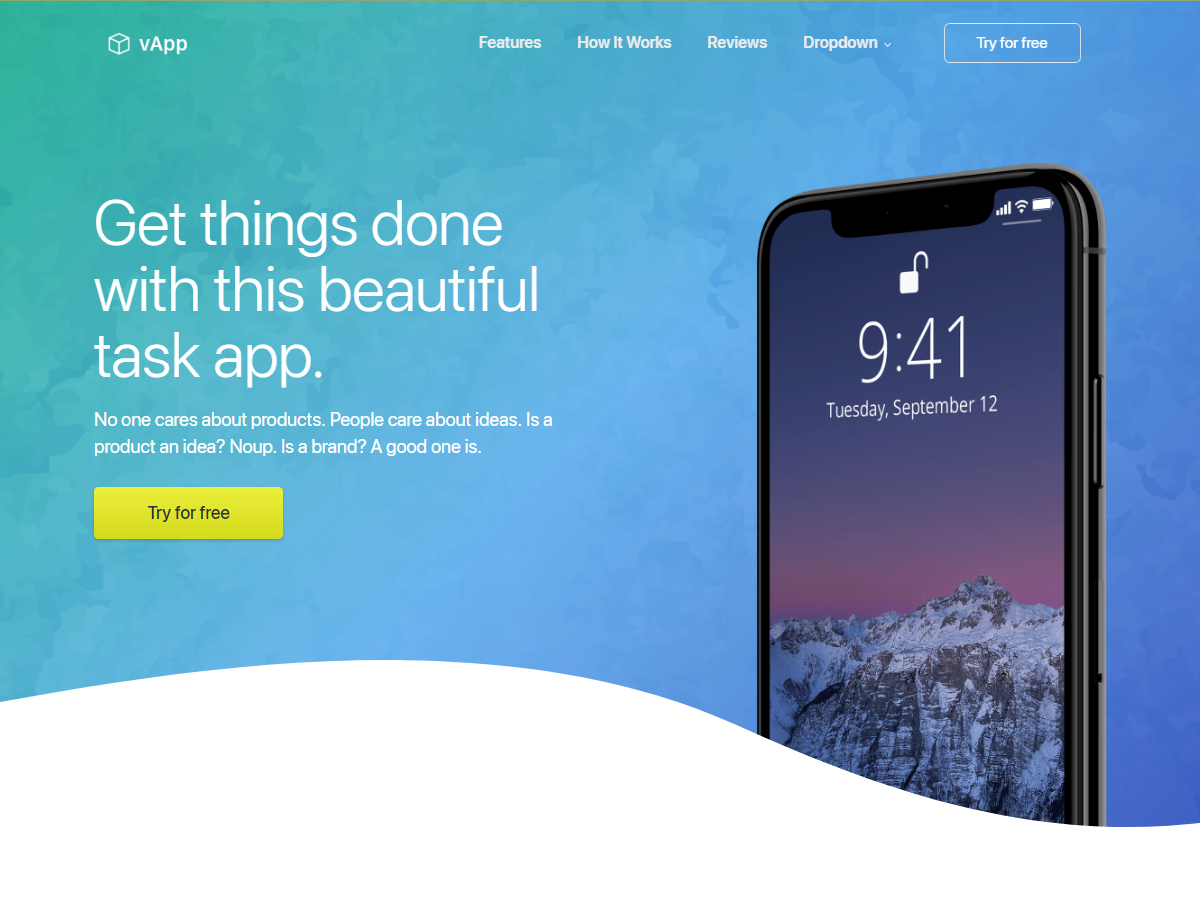
vApp is a powerful Responsive Software and App landing Page WordPress Theme. It is 100% responsive and looks stunning on all types of App, Saas (Software as a Service), Startup, Admin Dashboard, Tech Entrepeneurs business etc. vApp Responsive Software and App landing Page WordPress Theme is mixes between modern, classic, Elegant, Creative and Clean styles with better ui and ux. vApp is a perfect choice for you. Users will love Your site because it gives them a unique user experience(UX) and User Interface (UI).
vApp is fully compatible with latest version of Wordpress.
Upload and Activating theme - #back to top
Watch our video tutorials to learn about installing and activaing our theme.
Or read the documentation to learn about installing and activaing our theme.
-
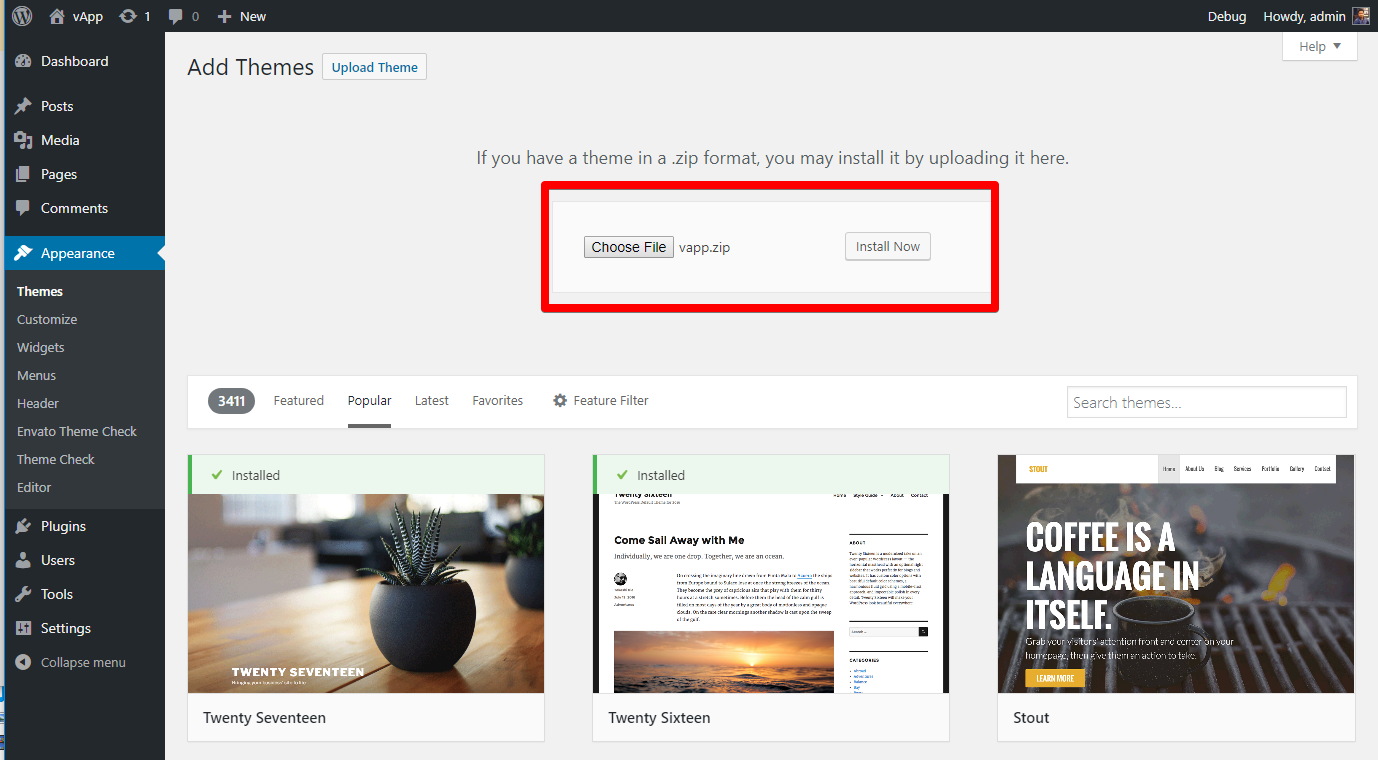
Navigate to Appearance → Themes in your WordPress admin dashboard
-
Click the Add New button at the top of the page then go for the Theme Upload option.
-
For the file upload, pick Theme Files / vapp-v4.0.zip in the theme package downloaded
-
from ThemeForest and click Install Now.
-
Click Activate once the upload has finished and you're ready for the next step: Installing the Plugins.
Installing Plugins - #back to top
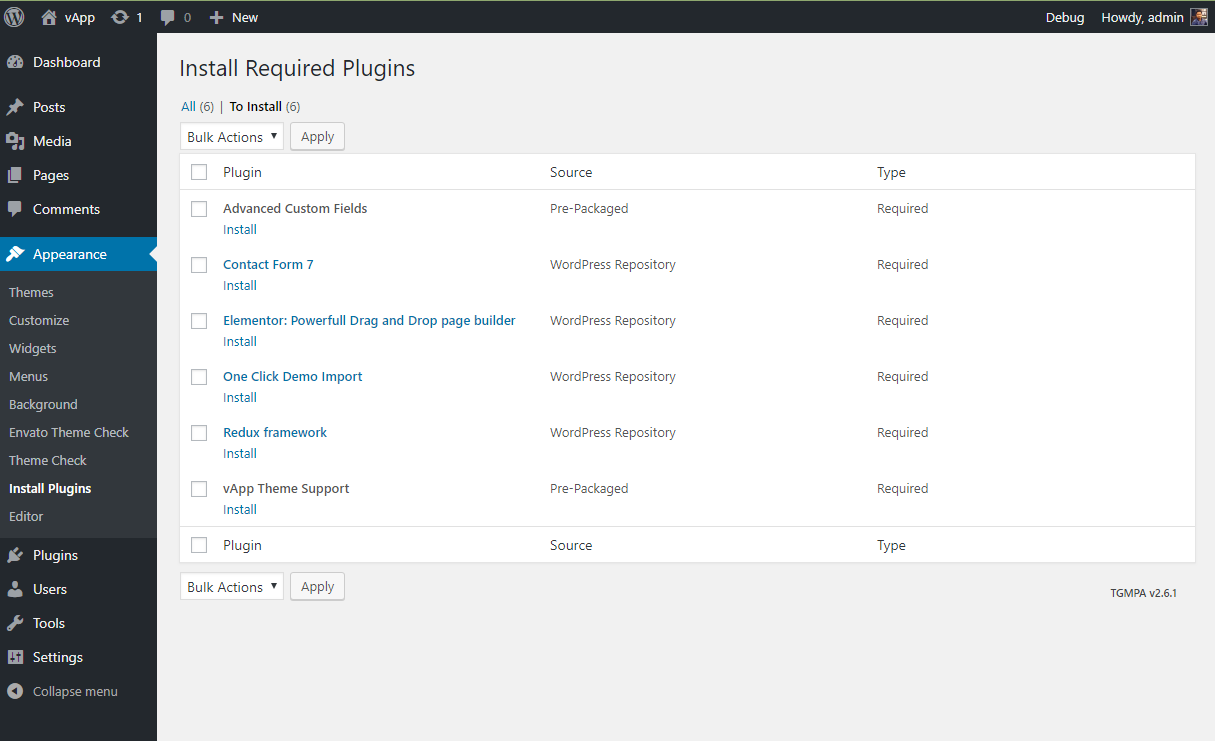
Right after the theme was activated, a notification at the top of the screen will suggest to continue with the installation of the plugins vApp recommended for getting the best our of your theme.
-
Click 'Begin installing plugins' and select all the plugins in the list.
-
Activate the Plugins you just installed.
Dummy Data Import - #back to top
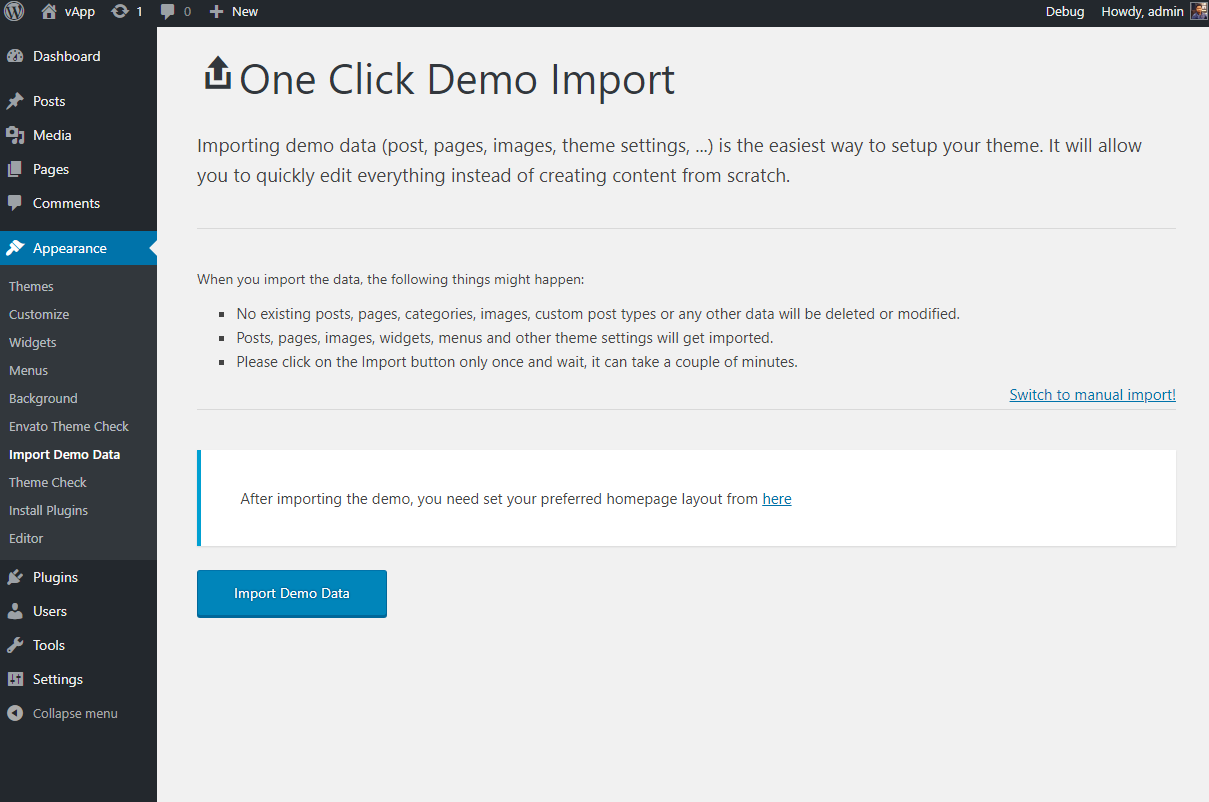
vApp comes with one click demo installation exactly like the original demo.
There's 2 ways of importing demo data.
Watch our video tutorials to learn about impoting and setting up demo content.
Or read the documentation to learn about impoting and setting up demo content.
-
Onc click demo import.
Just click on Import button and your demo site is ready.
-
Manual import.
If somehow the One click demo import fails to import your pages then you can try importing demo content manually.
-
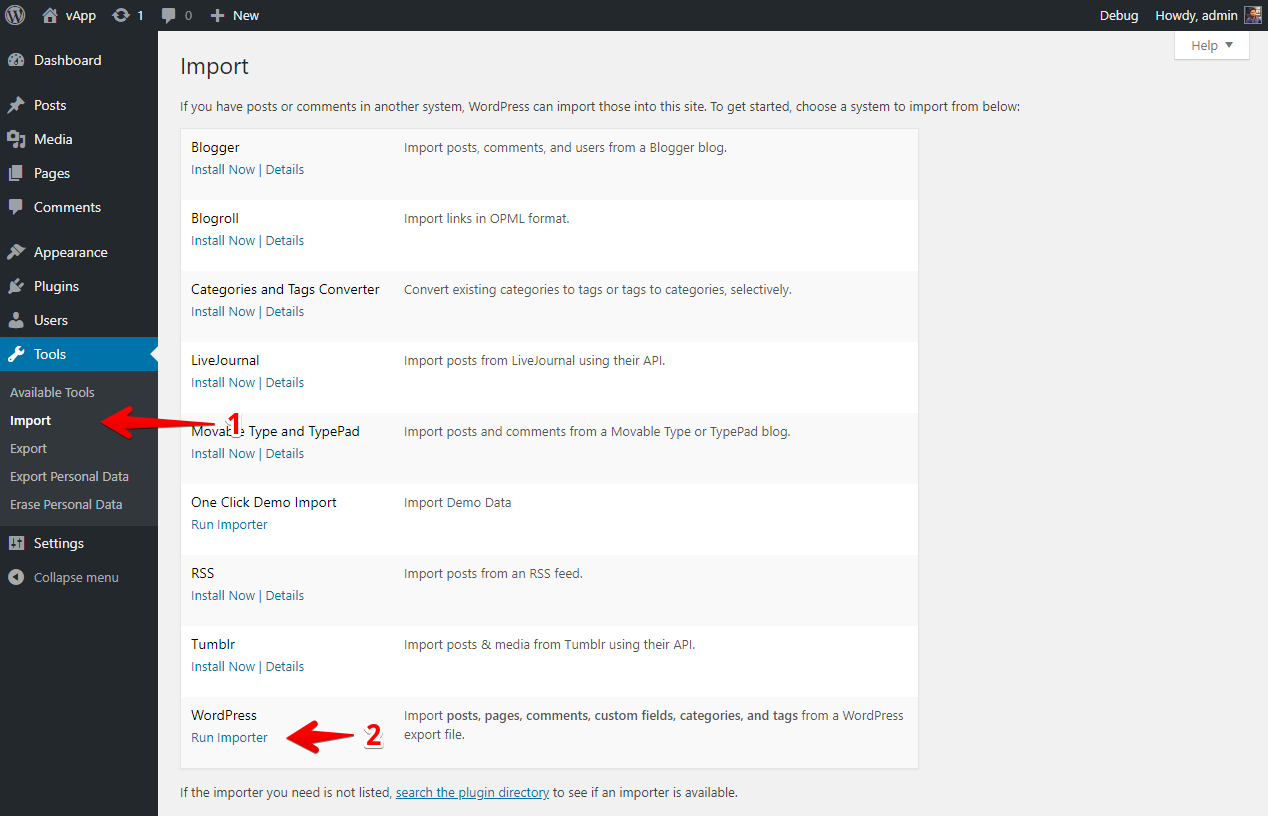
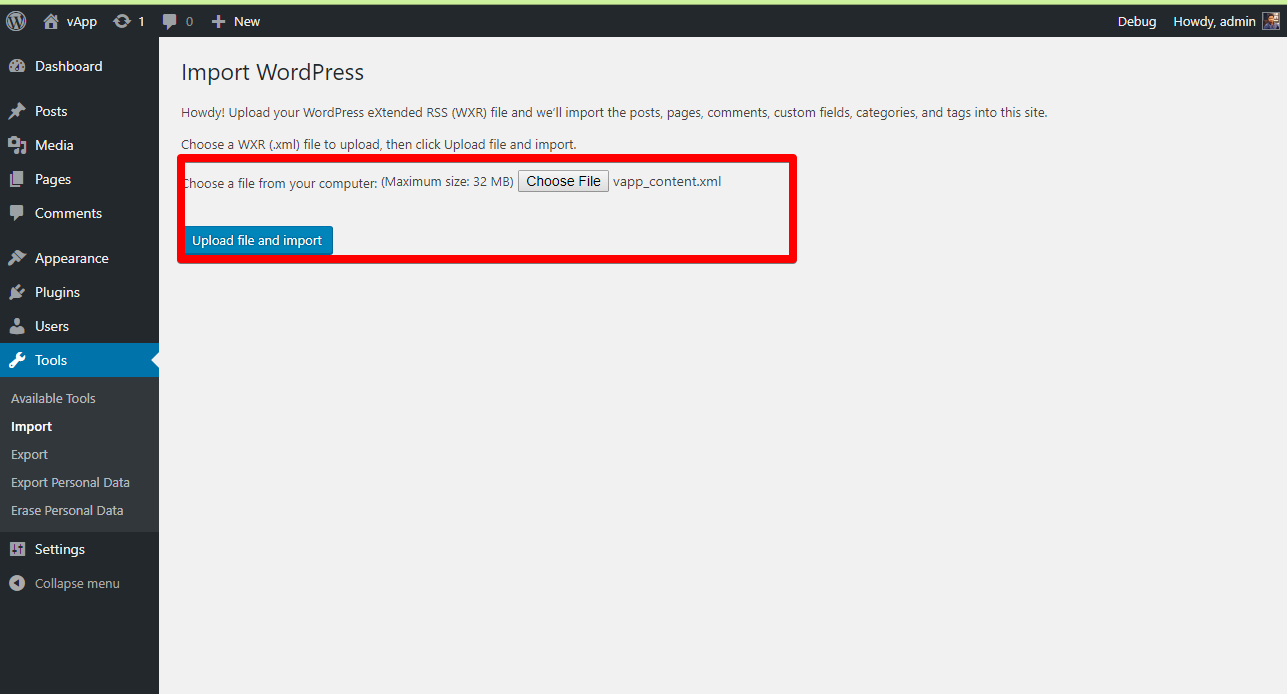
From your Wordpress admin dashboard, navigate to Tools → Import → WordPress.
-
Select the theme dummy data .xml file located in dummy-contents/vapp_contnet.xml
- Wait until you see the message Have Fun
-
From your Wordpress admin dashboard, navigate to Tools → Import → WordPress.
Important: Things to do now:
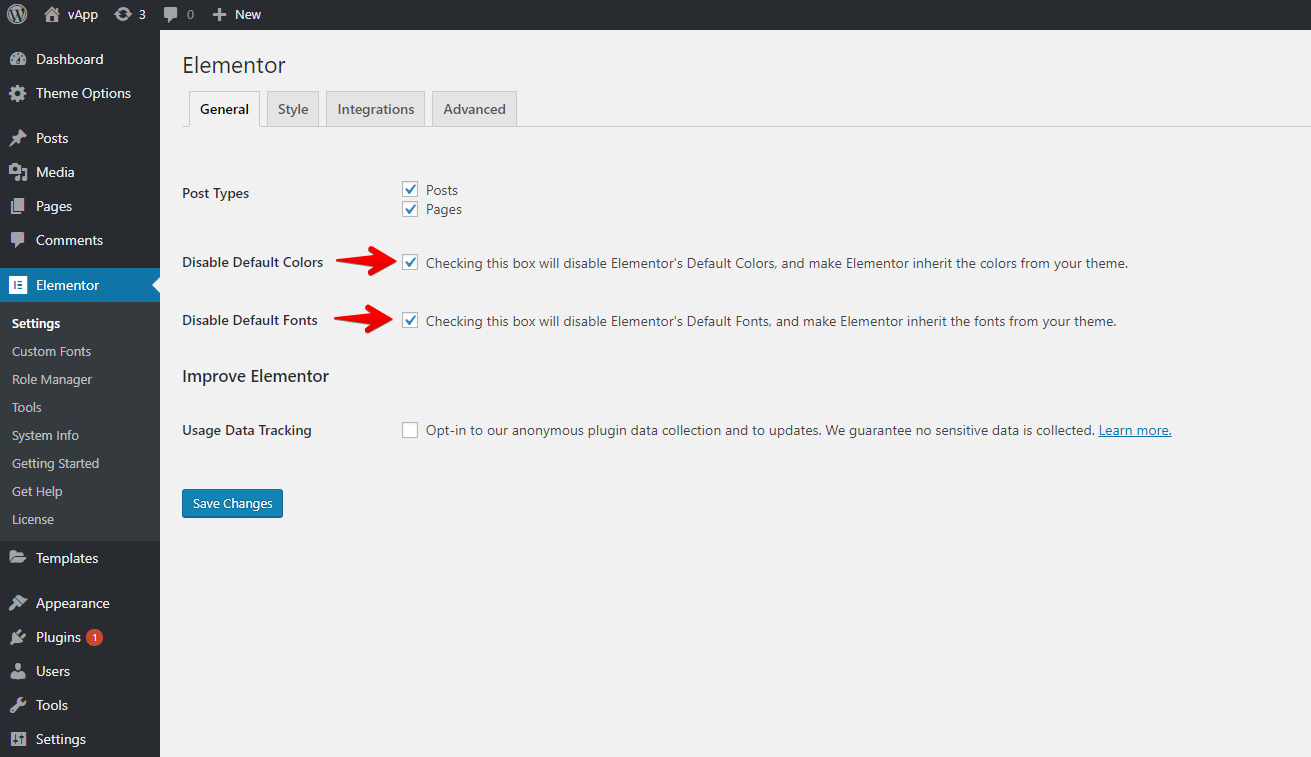
Please navigate to Elementor → Settings. and check on both Disable Default Colors & Disable Default Fonts options and Save settings.
Homepage & Blog Setup - #back to top
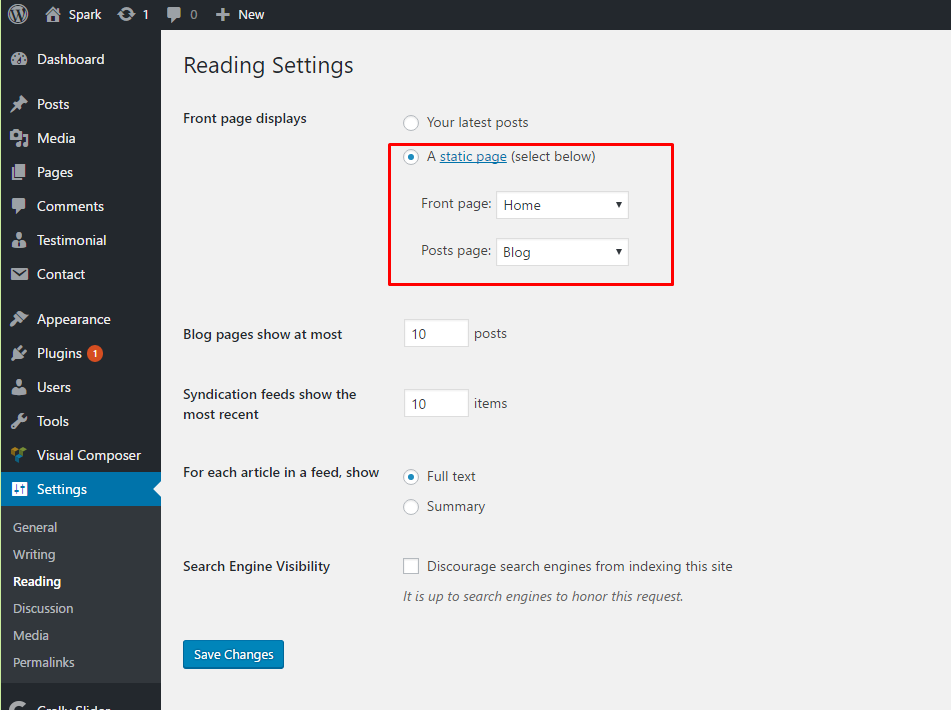
To setup the blog page, in your WordPress admin panel, navigate to Settings → Reading.
Assuming you already have a page named "Blog", for the Front page display, select "A static page" and choose your "Blog" page as the Posts page. This is what you should be seeing on your screen from left side.
To setup the home page, in your WordPress admin panel, navigate to Settings → Reading.
Assuming you already have a page named "Home", for the Front page display, select "A static page" and choose your "HOME page as the home page. This is what you should be seeing on your screen from left side.
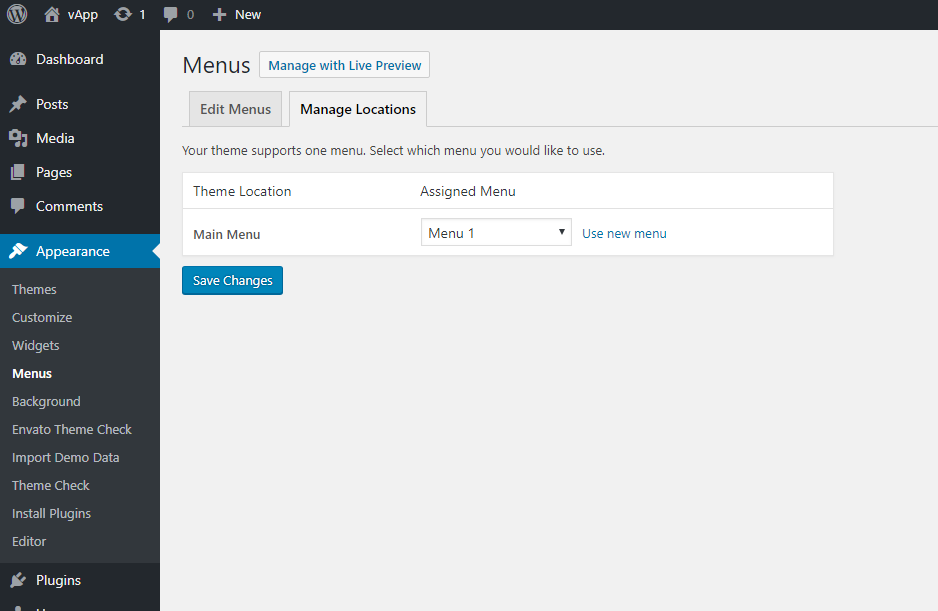
Menu Setup - #back to top
Theme Options - #back to top
Watch our video tutorials to learn about our vApp Theme Options.
Or read the documentation to learn about our vApp Theme Options.
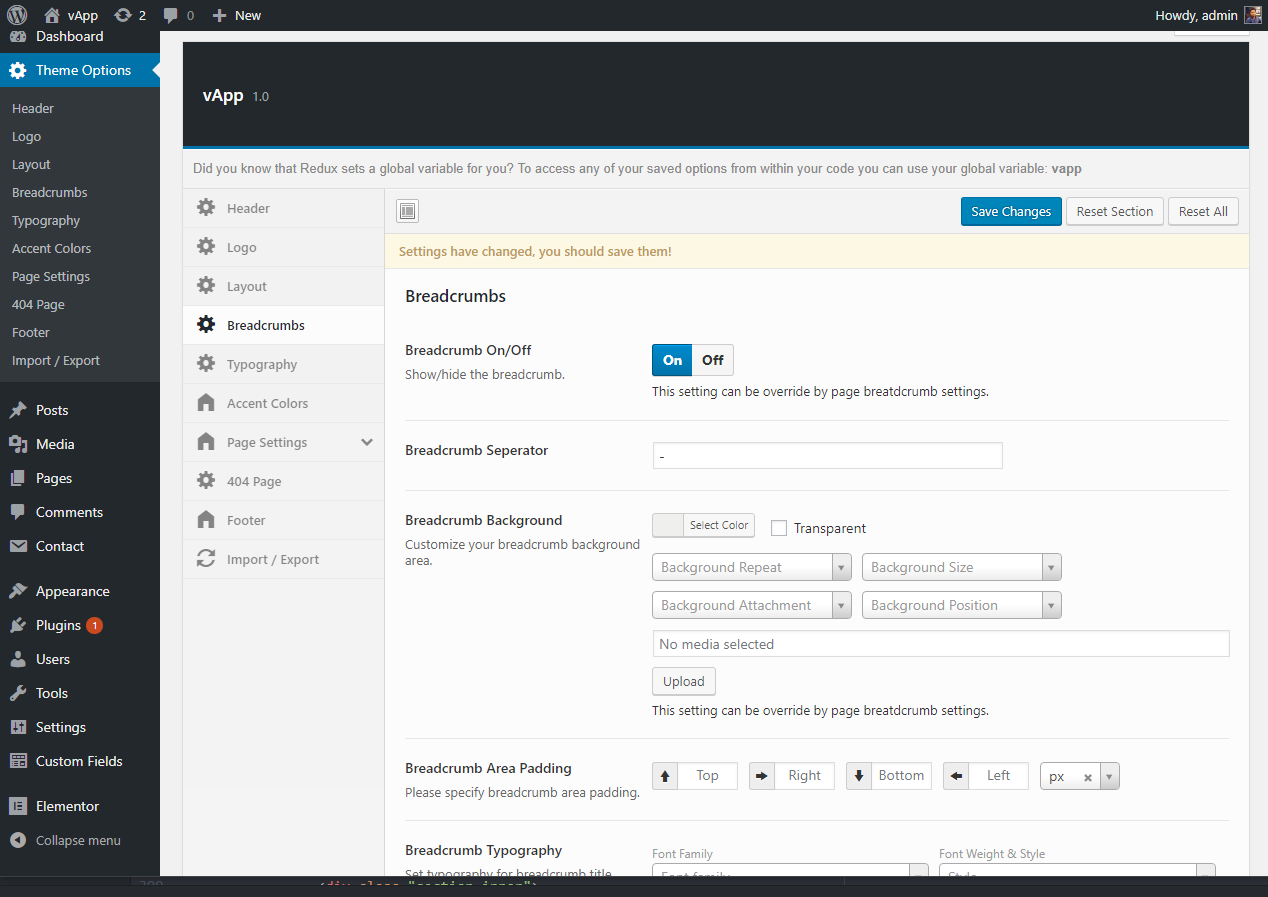
From your Wordpress admin dashboard, navigate to Theme Options
Header Options - #back to top
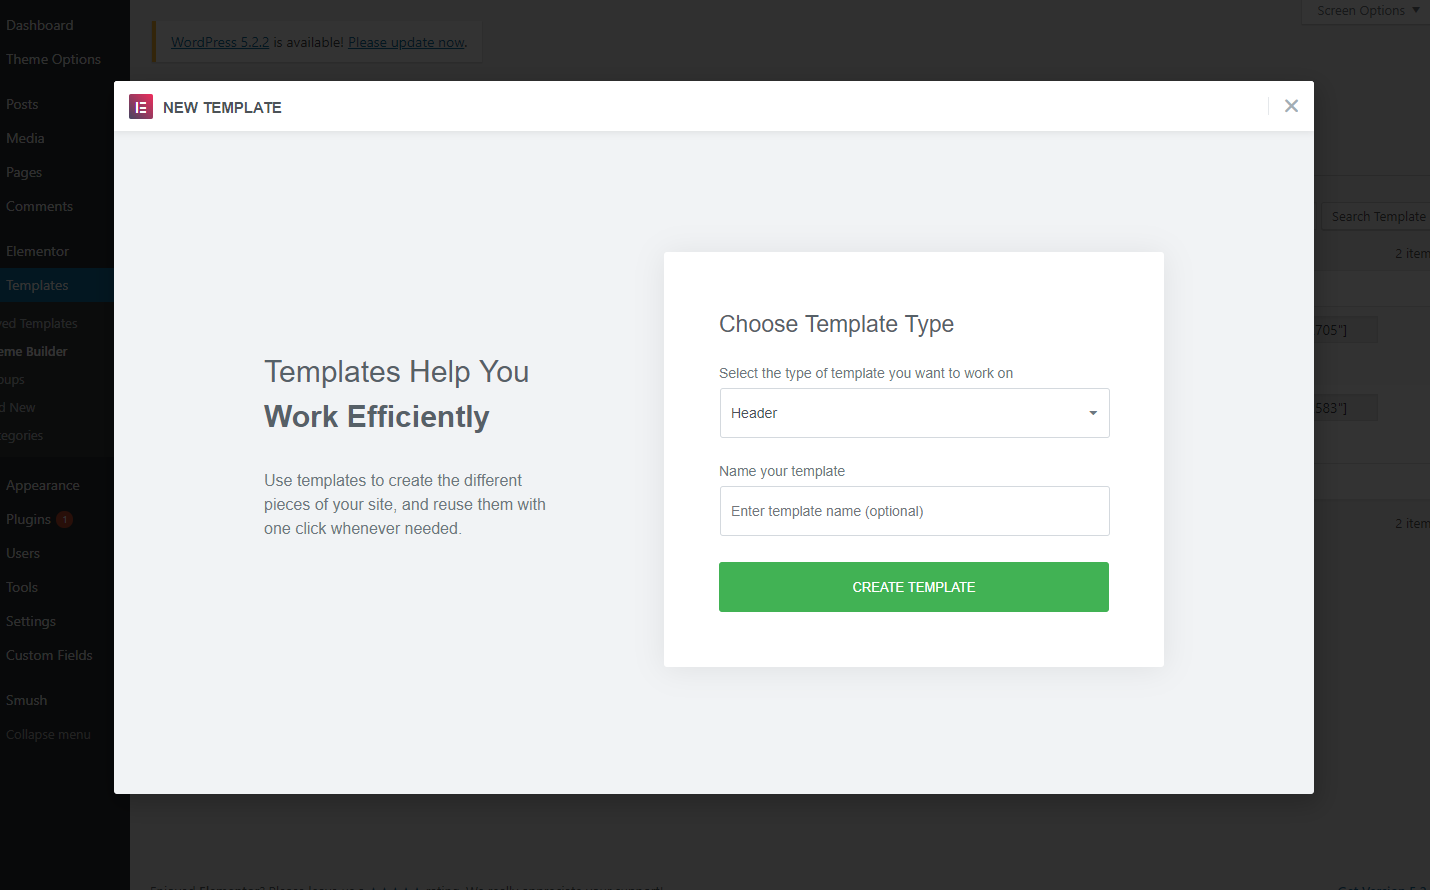
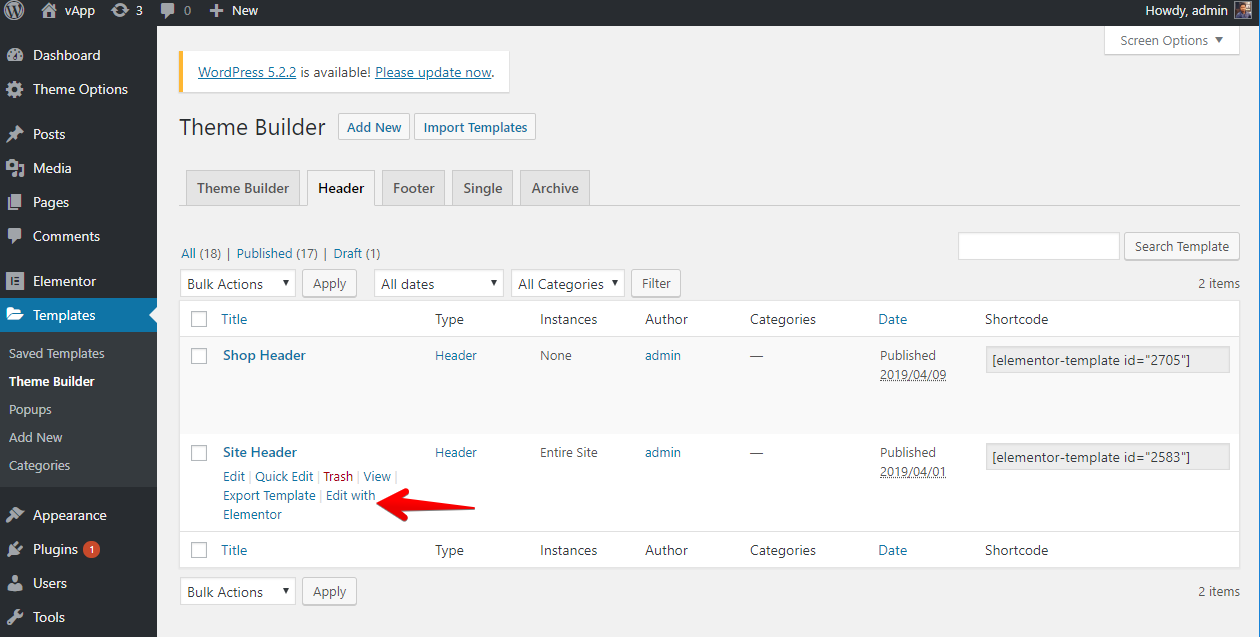
We have used Elementor Pro plugin to build site headers. It does things beautifully. By default, when you import demo you will see there's 2 headers.
And also, you can add new headers and create your header with Elementor page builder or duplicate our already created header and customize that. Now publish your header as global or give it some conditions where to display it, that's all.

Logo Setup - #back to top
There's two ways of updating logos
-
If your pages are using Elementor: Full Width [Page template] template
- then go to Templates -> Theme Builder and edit Site Header with Elementor
-
Or if your pages are using Elementor: Canvas [Page template] template
- then go to edit that page with Elementor and follow the rules
Click on the logo widget and upload your logo.
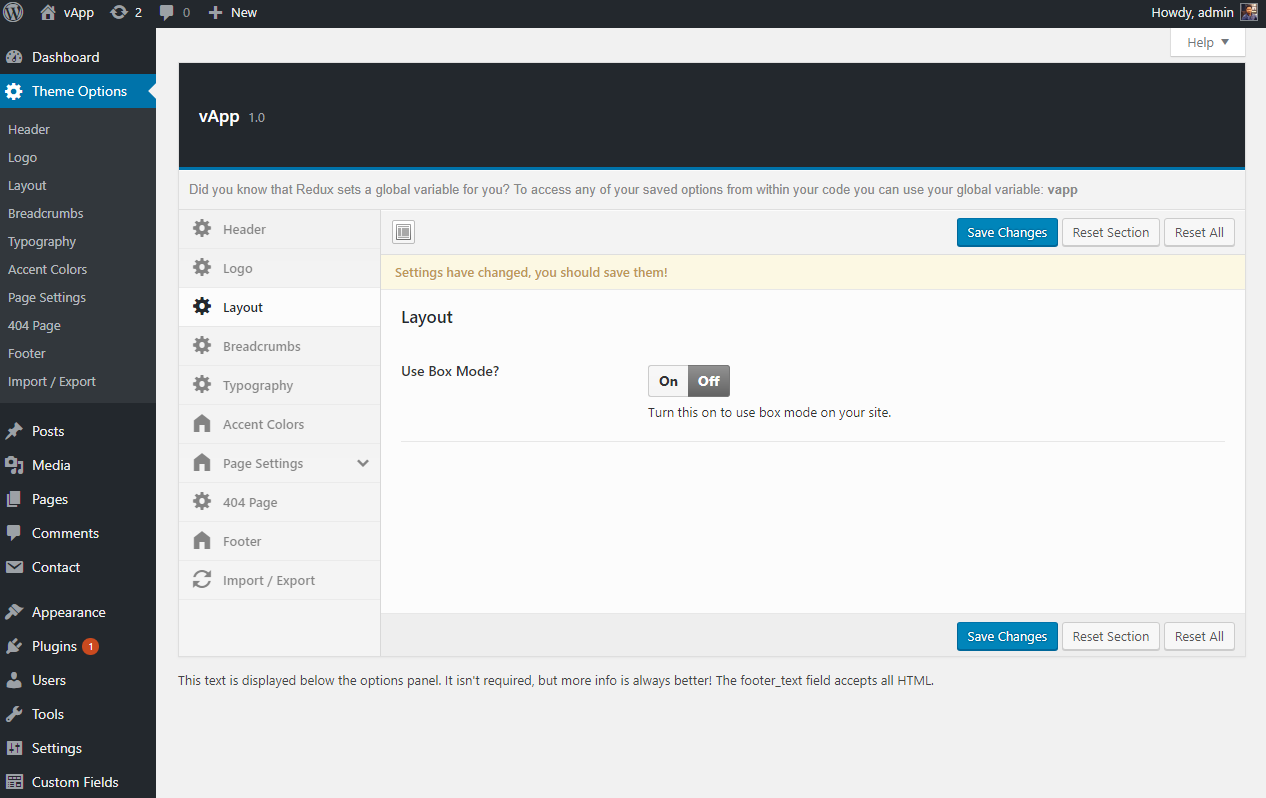
Box Mode - #back to top
From your Wordpress admin dashboard, navigate to Theme Options → Layout.
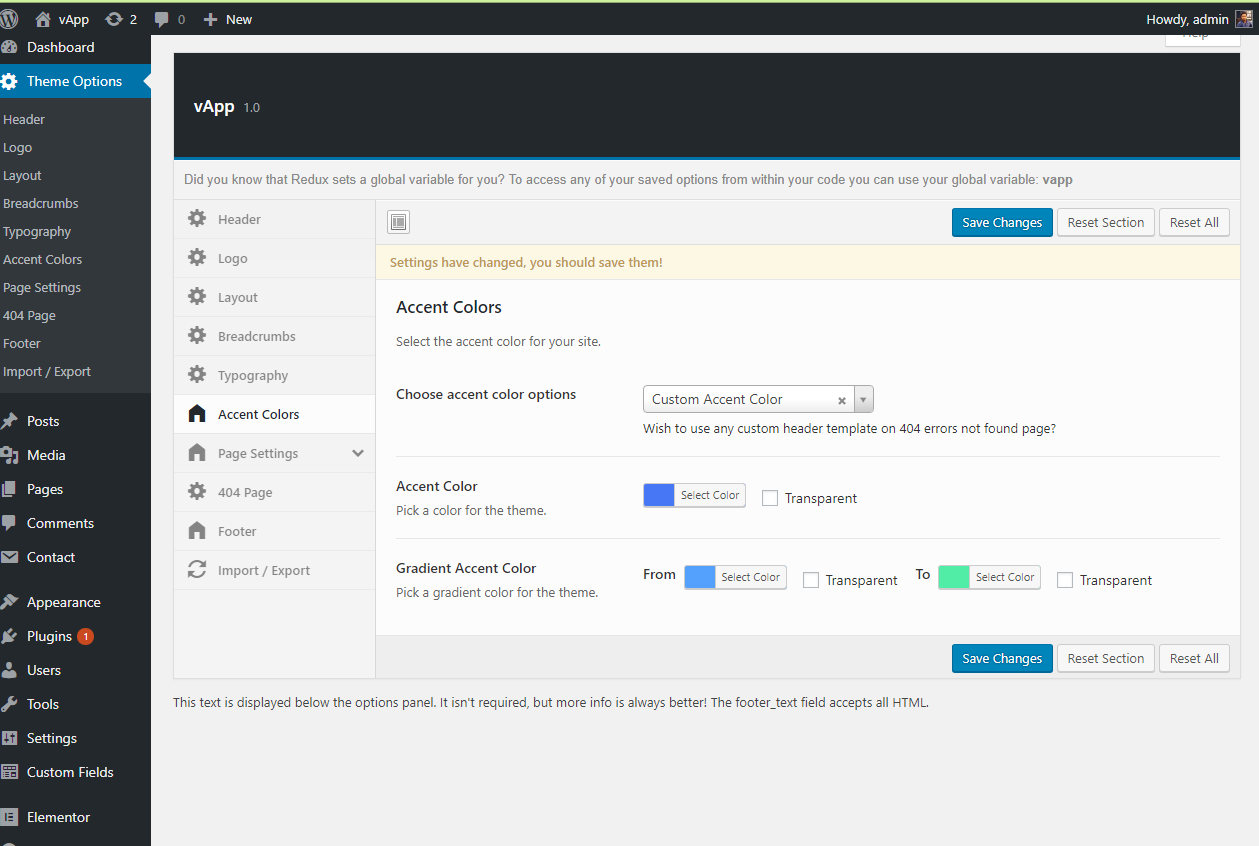
Accent Color - #back to top
From your Wordpress admin dashboard, navigate to Theme Options → Accent Colors.
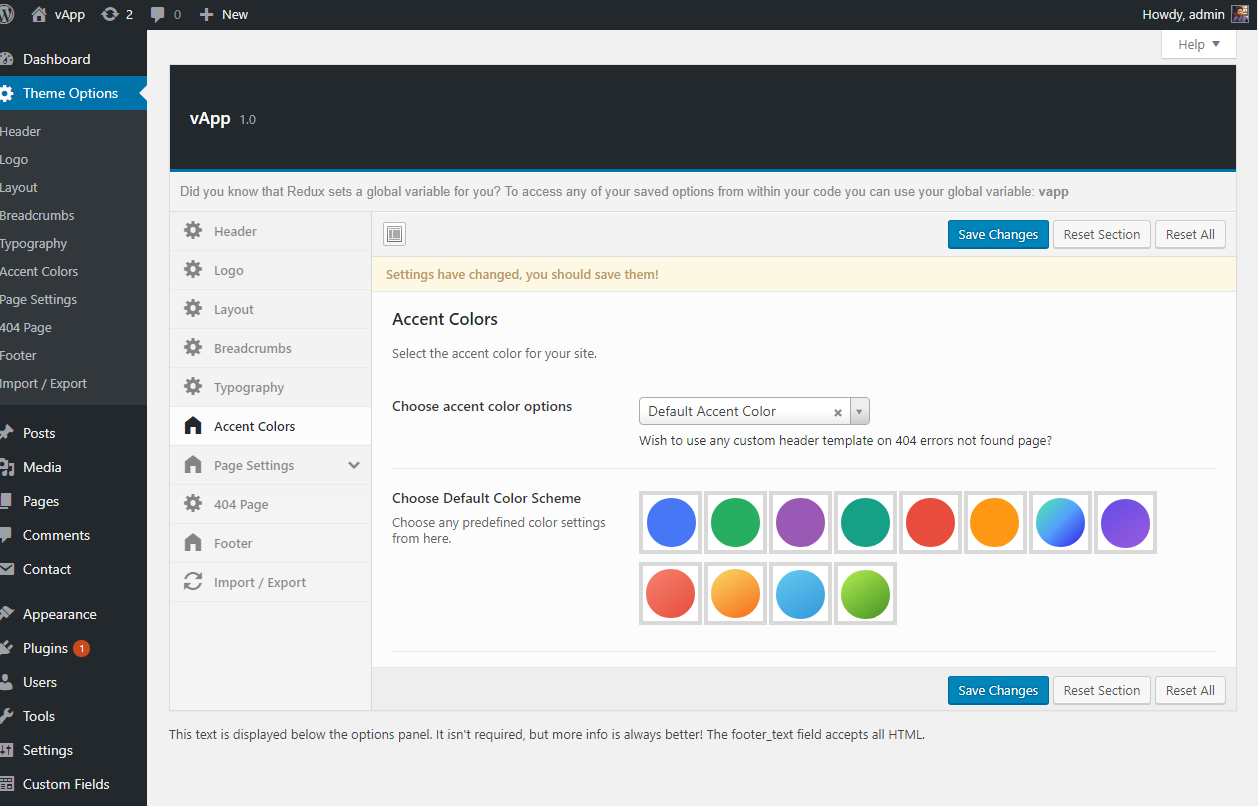
But if you want to have custom color scheme then choose Custom Accent Color. from the Choose accent color options dropdown.
Updating vApp - #back to top
When there's a new update available on Themeforest. Download the new updated theme. Then extract and upload new version from your dashboard Appearance → Themes.. Then activate the theme. During this process, your no website data will lost. Because all pages and posts data saves in Database.
Also after activating new theme, you needs to check that if there's any update available for vApp theme support plugin as well by visiting this page Appearance → Install Plugins.
Support & Credits - #back to top
If you need any help Feel free to contact with us at our Themeforest profile Dhrubok